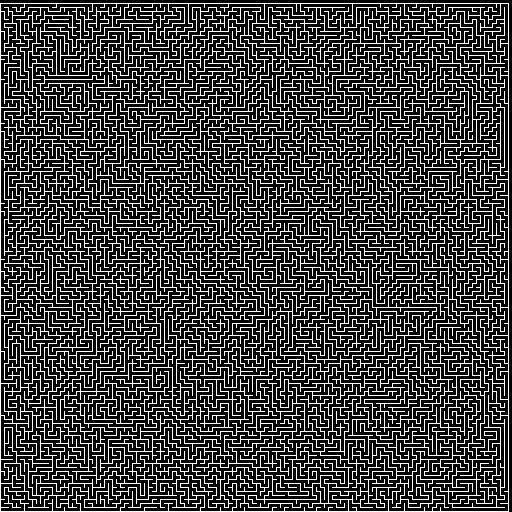
Implemented a depth-first search random maze generator for my project. C++11 in a single file:
https://github.com/corporateshark/random-maze-generator
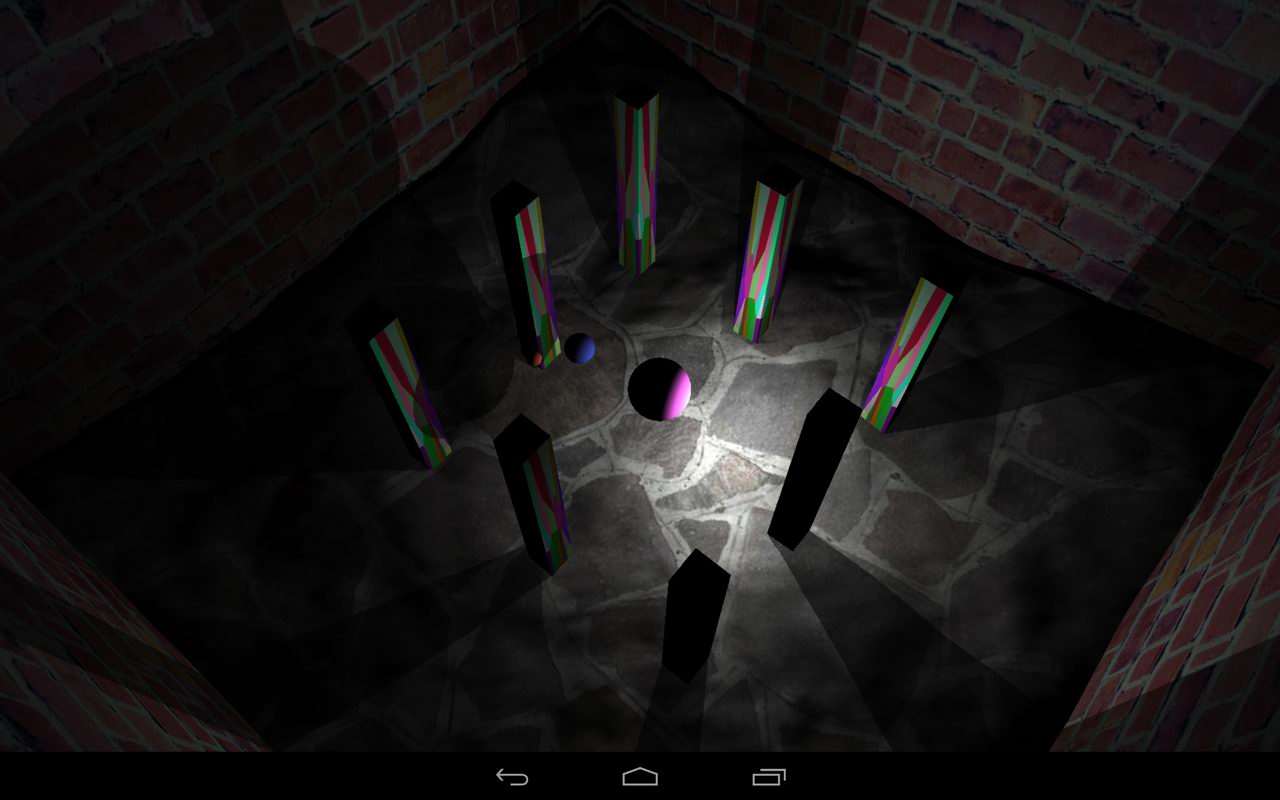
Here is the example of output:
Implemented a depth-first search random maze generator for my project. C++11 in a single file:
https://github.com/corporateshark/random-maze-generator
Here is the example of output:
I was curious why std::vector<>::pop_back() does not return the popped value. Instead, there is a pair of methods: void pop_back() and const_reference back() const.
The answer was obvious when I tried to implement a vector-like class myself. Here is the code for an implementation of a would-be T std::vector<>::pop_back():
	   T pop_back()
	   {
	      FSize -= 1;
	      // call copy ctor
	      T Copy( FArray[ FSize ] );
	      // call dtor
	      FArray[ FSize ].~T();
	      // return the copy - this can raise an exception,
	      // but the value has been already popped from the stack
	      return Copy;
	   }
The implementation of the canonical pop_back() is straightforward and does not perform any redundant fuss with copying:
	void pop_back()
	{
		FSize -= 1;
		// this is exception safe since the dtor never throws
		FArray[ FSize ].~T();
	}
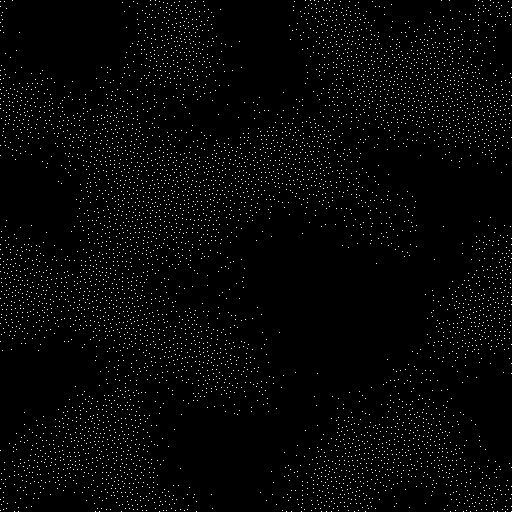
I wanted to add varying density maps to my poisson points generator. For example, I want to use this density field to generate foliage:

I started with multiplying the MinDist parameter by the density value. This broke the entire algorithm. The solution that works is to generate a rectangle full of poisson points and then roll a dice for every point and discard it if the roll of the dice is above the density value at the considered point:
			float R = RandomFloat();
			float P = g_DensityMap[ x + y * ImageSize ];
			if ( R > P ) continue;
Here is the resulting image:
The complete source code is on GitHub: https://github.com/corporateshark/poisson-disk-generator
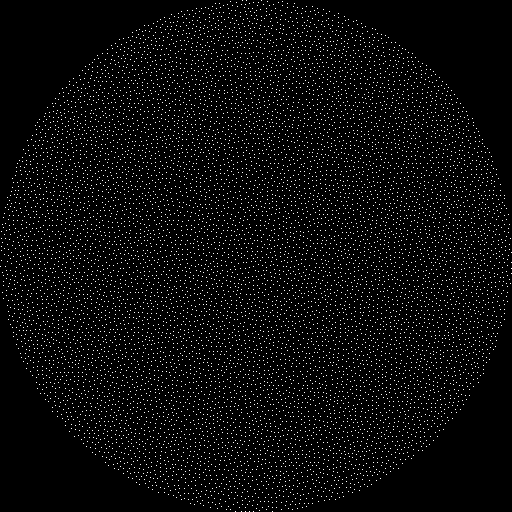
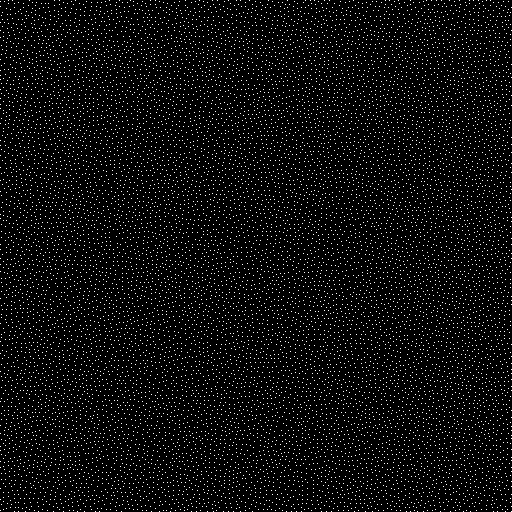
Was looking for a good implementation of 2D random points generator in C++ for my project.
Found this algorithm and this tutorial.
Here is my own implementation in C++11 packed into a single C++ file:
https://github.com/corporateshark/poisson-disk-generator
I hope it is simple enough to be useful for you.
I was implementing a kind of defocus blur transition effect between two UI screens and came up with the following shader:
/// viewport resolution (in pixels) in .xy and inverse resolution in .zw
uniform vec4  u_Resolution;
/// 0...1
uniform float u_TransitionValue;
/// virtual pixel size
uniform float u_PixelSize;
uniform sampler2D Texture0;
uniform sampler2D Texture1;
out vec4 out_FragColor;
void main(void)
{
	float T = u_TransitionValue;
	float S0 = 1.0;
	float S1 = u_PixelSize;
	float S2 = 1.0;
	// 2 segments, 1/2 each
	float Half = 0.5;
	float PixelSize = ( T < Half ) ? mix( S0, S1, T / Half ) : mix( S1, S2, (T-Half) / Half );
	vec2 D = PixelSize * u_Resolution.zw;
	vec2 UV = (gl_FragCoord.xy * u_Resolution.zw);
	// 12-tap Poisson disk coefficients:
	// https://github.com/spite/Wagner/blob/master/fragment-shaders/poisson-disc-blur-fs.glsl
	const int NumTaps = 12;
	vec2 Disk[NumTaps];
	Disk[0] = vec2(-.326,-.406);
	Disk[1] = vec2(-.840,-.074);
	Disk[2] = vec2(-.696, .457);
	Disk[3] = vec2(-.203, .621);
	Disk[4] = vec2( .962,-.195);
	Disk[5] = vec2( .473,-.480);
	Disk[6] = vec2( .519, .767);
	Disk[7] = vec2( .185,-.893);
	Disk[8] = vec2( .507, .064);
	Disk[9] = vec2( .896, .412);
	Disk[10] = vec2(-.322,-.933);
	Disk[11] = vec2(-.792,-.598);
	vec4 C0 = texture( Texture0, UV );
	vec4 C1 = texture( Texture1, UV );
	for ( int i = 0; i != NumTaps; i++ )
	{
		C0 += texture( Texture0, Disk[i] * D + UV );
		C1 += texture( Texture1, Disk[i] * D + UV );
	}
	C0 /= float(NumTaps+1);
	C1 /= float(NumTaps+1);
	out_FragColor = mix( C0, C1, T );
}
I get wrong results with this fragment shader on some mobile GPUs. For example, Andreno 330 on LG Nexus 5 gives just a series of shifted images instead of blur. Google Nexus 10 runs it just fine. Anyway, I will have to investigate it a bit later.
I can be doing something very important but if I get distracted for a little bit when I go back I totally forget what I was doing. Here is what happened today.
I wanted to code some new stuff and was about to add the line:
if ( !Node ) { return clPtr<clSceneNode>(); }
just before this line:
if ( !Node->LoadFromStream( Stream ) ) { return clPtr<clSceneNode>(); }
Suddenly I heard a phone ringing, got up from my computer, and left the code incomplete:
if ( !Node )
if ( !Node->LoadFromStream( Stream ) ) { return clPtr<clSceneNode>(); }
After the phone call I decided to drink some tee… I completely forgot what I was doing.
Long story short, when I returned to my coding I spent 30 minutes figuring out why my program was broken and what the heck was going on 🙁
I have a Virtual Box virtual machine and an Ubuntu installation running within it. Most of the time a do my development on Windows using Far Manager as my primary shell and text editor.
There is a nice plugin for it, called NetBox: http://plugring.farmanager.com/plugin.php?pid=859 (https://github.com/michaellukashov/Far-NetBox/downloads/),
which allows me to connect to a Linux machine via sshd and access its files as if they were on my local file system.
Here is a step-by-step checklist to make your Virtual Box sshd-enabled:
1. Run sudo apt-get install openssh-server
2. Run ifconfig and remember the IP-address on your virtual machine behind a NAT
3. Go to the Network settings menu: Settings → Network → Port Forwarding → Insert new rule and type:
Rule1 TCP
Reboot your VM. Now it is ready to accept sshd connections.
There are a few more steps to make your Far Manager to access the VM:
4. Unpack a NetBox distro to the plugins folder (for example, C:\Program Files (x86)\Far2\Plugins) and restart Far Manager
5. Press Alt-F1, select NetBox, press Shift+F4
6. Select the connection type: SCP. Enter the host IP-address and logic/password for your Ubuntu
This plugin allows not only accessing files but run the shell commands from Far.
Recently we have ported all the parts of our shading pipeline to OpenGL ES 3. The last piece of the puzzle was a decent implementation of omnidirectional shadow maps. We used a Virtual Shadow Depth Cube Texture (VSDCT) described in ShaderX3.
Here is a simple code snipped I wrote to convert cube map vec3 into a virtual texture vec2:
vec2 GetShadowTC( vec3 Dir )
{
	float Sc;
	float Tc;
	float Ma;
	float FaceIndex;

	float rx = Dir.x;
	float ry = Dir.y;
	float rz = Dir.z;

	vec3 adir = abs(Dir);
	Ma = max( max( adir.x, adir.y ), adir.z );

	if ( adir.x > adir.y && adir.x > adir.z )
	{
		Sc = ( rx > 0.0 ) ? rz : -rz;
		Tc = ry;
		FaceIndex = ( rx > 0.0 ) ? 0.0 : 1.0;
	}
	else if ( adir.y > adir.x && adir.y > adir.z )
	{
		Sc = rx;
		Tc = ( ry > 0.0 ) ? rz : -rz;
		FaceIndex = ( ry > 0.0 ) ? 2.0 : 3.0;
	}
	else
	{
		Sc = ( rz > 0.0 ) ? -rx : rx;
		Tc = ry;
		FaceIndex = ( rz > 0.0 ) ? 4.0 : 5.0;
	}

	float s = 0.5 * ( Sc / Ma + 1.0 );
	float t = 0.5 * ( Tc / Ma + 1.0 );

	s = s / 3.0;
	t = t / 2.0;

	float Flr = floor(FaceIndex / 3.0);
	float Rmd = FaceIndex - (3.0 * Flr);

	s += Rmd / 3.0;
	t += Flr / 2.0;

	return vec2( s, t );
}
The distance from the light source is packed into a 8-bit RGBA texture using this trick. Everything else is pretty straightforward.
Android demo (requires OpenGL ES 3).
There a lot of tutorials out there on how to build your own Android ROM from sources and how to integrate your application into the build process. However, there are very few clean instructions on how to put your own precompiled .apk into the ROM. Here is how (I assume you have an Android working tree ready):
LOCAL_PATH := $(call my-dir)include $(CLEAR_VARS)
LOCAL_MODULE_TAGS := optional
LOCAL_MODULE := <your-app-name>;
LOCAL_CERTIFICATE := PRESIGNED
LOCAL_SRC_FILES := $(LOCAL_MODULE).apk
LOCAL_MODULE_CLASS := APPS
LOCAL_MODULE_SUFFIX := $(COMMON_ANDROID_PACKAGE_SUFFIX)
include $(BUILD_PREBUILT)
Now Android build system will recognize the package with your application. To include it into the ROM add <your-app-name> to the PRODUCT_PACKAGES variable for a desired target configuration. I.e. in build/target/product/full_base.mk.
Build the ROM as usual and you will have your precompiled application embedded into it.
If you have native C++ library inside your .apk, you should unpack it manually, put into the packages/apps/<your-app-name> folder and describe it in Android.mk:
include $(CLEAR_VARS)
LOCAL_IS_HOST_MODULE:=
LOCAL_MODULE_CLASS:=SHARED_LIBRARIES
LOCAL_MODULE_TAGS:=optional
OVERRIDE_BUILT_MODULE_PATH:=$(PRODUCT_OUT)/obj/lib
LOCAL_UNINSTALLABLE_MODULE:=
LOCAL_SRC_FILES:=<your-library.so>
LOCAL_BUILT_MODULE_STEM:=<your-library.so>
LOCAL_STRIP_MODULE:=
LOCAL_MODULE:=<your-library>
LOCAL_MODULE_STEM:=<your-library.so>
LOCAL_CERTIFICATE:=
LOCAL_MODULE_PATH:=$(PRODUCT_OUT)/system/lib
LOCAL_REQUIRED_MODULES:=
LOCAL_SHARED_LIBRARIES:=
include $(BUILD_PREBUILT)
Add it as a dependency to your prebuilt .apk package:
LOCAL_REQUIRED_MODULES := <your-library>
The library will be copied to the system/lib folder of the target ROM.
I did some BlackBerry 10 development this year and found its native C/C++ development environment very friendly. However, Momentics IDE is nice but I was looking for a clean command-line environment to automate my daily builds and tests. It came out, the Native SDK comes with a full set of Windows-based tools required to do it, which reside in the host_…\win32\x86\usr\bin\ folder.
To make a .bar package:
blackberry-nativepackager -devMode -package <name.bar> bar-descriptor.xml
To install .bar on your device or emulator:
blackberry-deploy -installApp -launchApp -device <device_ip> <name.bar>
To bring a log file back to your PC from the device:
blackberry-deploy -getfile logs/log FileOnPC.txt -device <device_ip> <name.bar>
-devMode is required to let others access the “logs/log“ file (and other temp files).
P.S. Official documentation: https://developer.blackberry.com/native/documentation/core/com.qnx.doc.native_sdk.devguide/com.qnx.doc.native_sdk.devguide/topic/c_understanddevenv_use_commandline.html